|
Getting started - Step 4: Explanations
In the final step of this tutorial, you will add some feedback, or explanations, to our application. Explanations can be Text, a webpage (HTML), an Image, Sound, Video or a combination of text and images (a Canvas). Here it is described how to add Text feedback to the two assignments that were created in step 3. You begin by creating a single explanation element that is meant to open when the learner closes the Do It assignment. We call this type of feedback Overall feedback.
4.1 Overall feedback for the Do It assignment
| 1. | Begin by dragging a Text explanation from the Library to the application. |
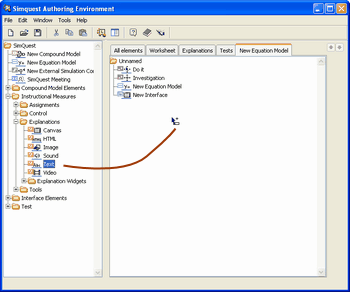
Dragging a Text explanation to the application.
| 2. | Let's make some copies of the Text explanation. |
| • | Select the Text element in the application, right click and choose Copy. |
| • | Right click again and choose Paste. |
| • | Make 3 copies for this demonstration. |
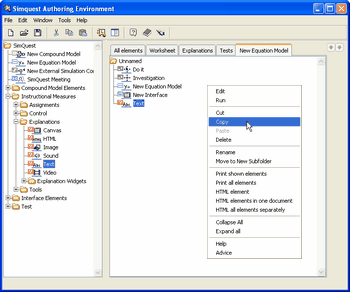 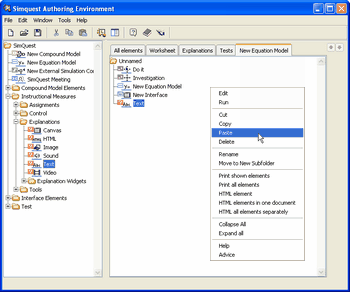
Copying (left) and pasting (right) the Text explanation.
| 3. | You may want to Rename the Text elements to be able to tell them apart later on. |
| • | Select the Text element in the application, right click and choose Rename. |
| • | Type new name for the elements, for instance Text 1, Text 2 etc.. Click Ok. |
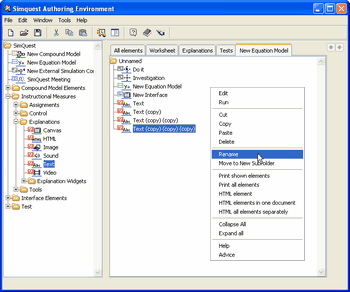 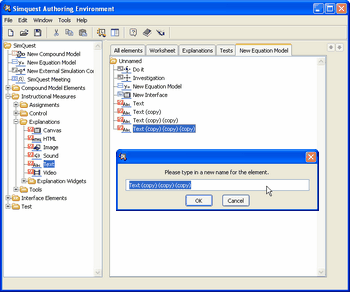
Renaming a Text explanation.
| 4. | Now edit the Explanation text for the four Text explanations. |
| • | Select the Text element in the application, right click and choose Edit. |
| • | Go to the Explanation tab sheet. Type the Explanation text, for instance as seen below. |
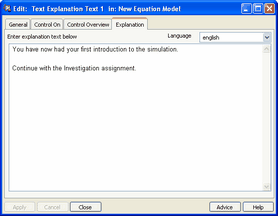
Editing an explanation text.
| 5. | You will add the above explanation to the Do It assignment, so that it will open when the learner closes the assignment. |
| • | Edit the Do It assignment. Go to the Control On tab sheet. |
| • | Change the top menu to WHEN THIS ELEMENT IS Exited. Leave the other two as they were. |
| • | Drag the Text explanation from the application to the white box on the Control On tab sheet and drop it there. |
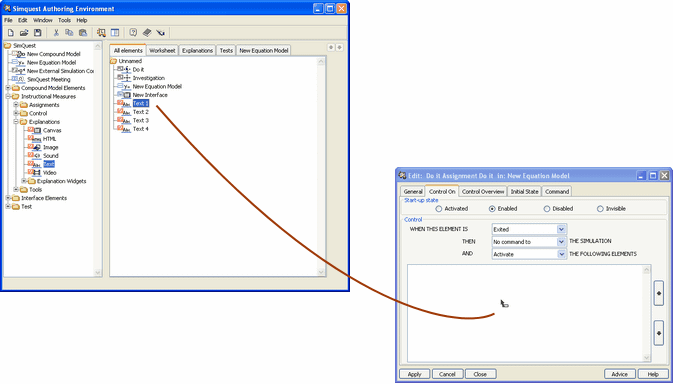
Dragging the explanation to the Control On tab sheet of the Do It assignment.
| 6. | Run the Do It assignment. If you followed the above steps correctly, the Text explanation should pop up when you close the assignment. |
4.2 Separate explanations for separate propositions
With Investigation assignments, you can specify separate explanations for every answer proposition.
| 1. | First you will make the feedback text. Below some example texts were used, but you are of course free to add any text you like. |
| • | Edit the explanation you named Text 2. On the Explanation tab sheet, type "That is correct. The line becomes steeper when a increases". |
| • | Edit the explanation you named Text 3. On the Explanation tab sheet, type "That is not correct. The line becomes steeper when a increases". |
| • | Edit the explanation you named Text 4. On the Explanation tab sheet, type "That is not correct. Something does happen to the graph: the line becomes steeper when a increases". |
| 2. | Now you must link the feedback to the answer proposition. This is done as follows. |
| • | Edit the Investigation assignment. Go to the tab sheet. |
| • | Drag the Text 2 element to answer proposition a (see the figure below). Drop it in the box in the Explanation column. |
| • | Click on the line of answer proposition b. Drag Text 3 to the Explanation column of answer proposition b. |
| • | Click on the line of answer proposition c. Drag Text 4 to the Explanation column of answer proposition b. |
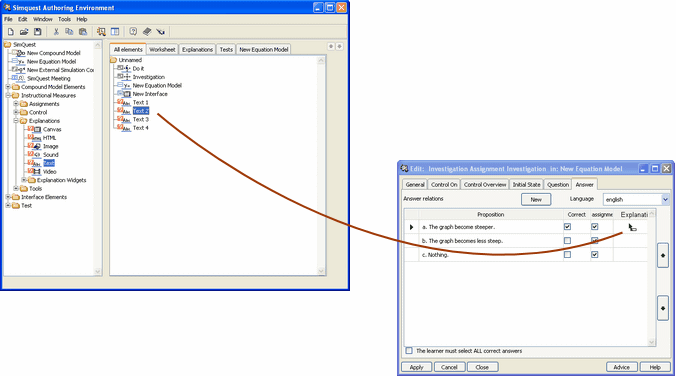
Dragging explanations to the Answer tab sheet of an Investigation assignment.
Optionally, you can also link an Overall explanation to an Investigation assignment. When you do so, an explanation element will open when the learner has used up all attempts without selecting the right answer (the number of attempts can be set on the Initial State tab sheet of the assignment editor). To add Overall feedback, follow these final steps:
| • | Edit the Investigation assignment. Go to the Control On tab sheet. |
| • | From the pull down list behind 'WHEN THIS ELEMENT IS', select Failed. |
| • | Create a new Text explanation, e.g. Text 5. |
| • | As in the figure below: drag this new explanation element from the application window into the large white box on the Control On tab sheet, and drop it. |
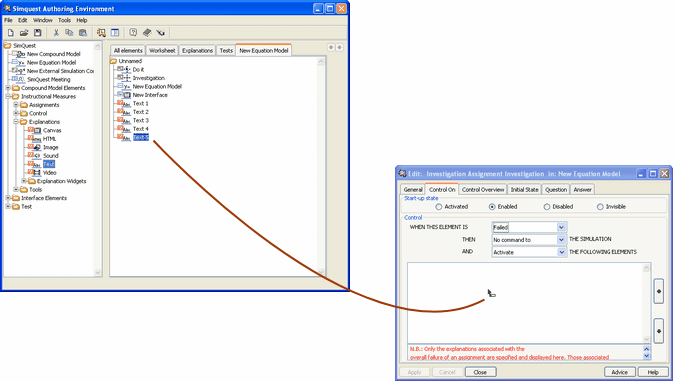
Dragging an explanation element onto the Control on tab sheet of an investigation assignment, to create Overall feedback.
Congratulations! You are done. If you followed all four steps of this tutorial, you just created you first SimQuest application. Before you continue working with SimQuest, we recommend you take a look at the information in the Basic Operations folder. This should familiarize you a bit further with the techniques used to operate the SimQuest authoring environment. After that, you can continue to experiment with other elements from the SimQuest library. If you like, you can download some simulations from the SimQuest website, which you can perhaps use for inspiration. We hope you will enjoy using the software.
Copyright University of Twente 2011
|