|
SimQuest 6.4 help |
|
|
Getting started - Step 1: A Model
There are different types of models in SimQuest, but for now you will only work with an Equation model. Equation models consist of a number of typed equations. You are going to add two equations to the model:
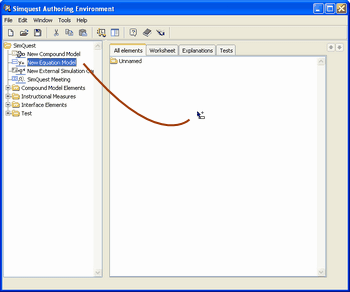
1.1 Adding a model to the application First, an empty model has to be added to the application. Act as follows:
Dragging a New Equation Model into the application.
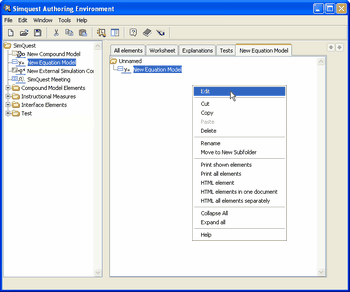
Editing a New Equation Model.
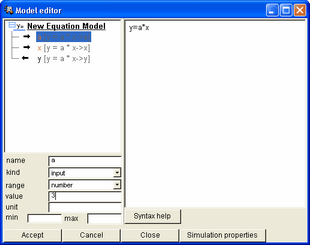
1.2 Adding the first equation Now you can add equations to the Equation Model. These equations form the basis of the learning environment. Like all equations, the equations in an Equation model consist of independent input and dependent output variables. In the equation y = a * x for instance, y is dependent of the input variables x and a. Let's enter this equation in the equation editor:
Entering the equation y=a*x in the Equation editor.
You will see that the three variables a, x and y have appeared in a list on the left. Two of these, both input variables, are red. This is because no initial conditions were yet specified. This step is necessary to be able to run the model later on. Therefore, select the variable in the list on the left, and type an initial value in the value box at the bottom of the editor.
Specifying an initial value for an input variable.
You can now continue adding as many equations as you like. You do not need to use single letters for variables. You may for instance also use: variable1 = variable2 + variable3.
1.3 Making the model dynamic The model you have created in the steps above is static. This means that none of the values of the variables changes with time. You are now going to turn the static model into a dynamic one, in which x will be a function of time.
Now x becomes a state-variable and t a time variable. SimQuest solves x for every time step numerically. Since the increment is simply equal to one, x will always have the same value as the time variable t. After you added the new equation to your model, click Accept. Then:
Your model is now complete: you can move on to Step 2 and start to work on your first interface.
>> Continue to Step 2: Interfaces
|